
“Classic Spice Cake Recipe: Warm and Cozy Dessert Delight!”
Have you ever wondered why some desserts feel like a warm hug on a chilly fall day? Our classic spice cake recipe is here to answer that question. Packed with a comforting blend of flavors, this treat is perfect for those cozy moments when you crave something sweet and satisfying.
This dessert is more than just a cake. It’s a celebration of fall, with cinnamon and other spices creating a rich, warm profile. The moist crumb and tangy cream cheese frosting make it a standout choice for any gathering. Plus, it’s a make-ahead treat that tastes even better the next day.
We’ve carefully crafted this recipe to bring out the best in every ingredient. From the brown sugar to the flour, each component plays a role in creating a dessert that’s both indulgent and comforting. Whether you’re baking for a special occasion or just because, this cake is sure to delight.
Key Takeaways
- Perfect for fall, this cake features a warm blend of spices like cinnamon.
- The moist crumb and tangy cream cheese frosting make it irresistible.
- Ideal for gatherings or as a make-ahead treat that improves with time.
- Made with simple ingredients like brown sugar and flour for a rich flavor.
- Comforting and indulgent, it’s a dessert that feels like a warm hug.
A Cozy Introduction to Our Classic Spice Cake
There’s something magical about the aroma of warm spices filling your kitchen. It’s a scent that instantly brings comfort and joy, setting the stage for a dessert that’s as inviting as it is delicious. Our classic creation is more than just a treat—it’s an experience that wraps you in warmth with every bite.
The natural sweetness and unique flavor of this dessert come from a perfect blend of spices. Each ingredient is carefully chosen to create a harmony that’s both rich and comforting. Whether it’s the hint of cinnamon or the depth of nutmeg, every spice plays a role in making this dessert unforgettable.

To achieve the perfect texture, we recommend using ingredients at room temperature. This ensures a smooth batter and a moist crumb that’s simply irresistible. Taking the time to mix the ingredients carefully is key to creating a dessert that’s as beautiful as it is tasty.
While this treat is delicious on its own, the cream cheese frosting adds an extra layer of indulgence. Its tangy sweetness complements the warm spices perfectly, making every bite a delight. It’s a combination that’s hard to resist and even harder to forget.
This recipe is more than just a dessert—it’s a cherished tradition. It brings back memories of cozy fall gatherings, where the scent of baking fills the air and loved ones gather around the table. It’s a reminder of the simple joys that make life sweeter.
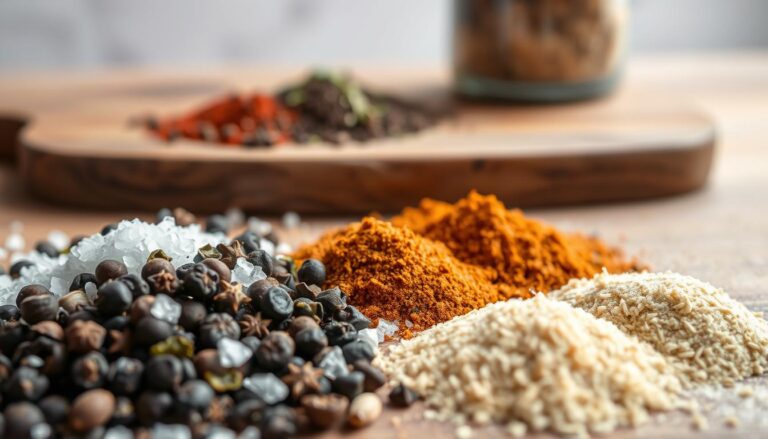
Essential Ingredients for a Perfect Spice Cake
Every great dessert starts with the right ingredients, and this one is no exception. The key to achieving that perfect balance of flavor and texture lies in the components you choose. From pantry staples to special additions, each ingredient plays a vital role in creating a treat that’s both moist and flavorful.

Pantry Staples and Must-Haves
To build the foundation of this dessert, you’ll need a few basic items. All-purpose flour provides structure, while brown sugar adds a rich, caramel-like sweetness. A combination of baking soda and baking powder ensures a light and airy crumb.
Don’t forget the eggs—they bind everything together and contribute to the moistness. A precise cup of applesauce not only enhances the texture but also adds a subtle fruity note. These dry ingredients are the backbone of the recipe, so measure them carefully for the best results.
Special Touches for Extra Flavor
For an added layer of depth, consider incorporating shredded apple or zucchini. These ingredients introduce extra moisture and a hint of natural sweetness. If you’re feeling adventurous, a touch of molasses can amplify the richness of the spice cake.
Pumpkin is another optional addition that brings a seasonal twist. Its creamy texture pairs beautifully with the warm spices. Whether you stick to the basics or experiment with these extras, each ingredient contributes to a truly delectable outcome.
Step-by-Step Preparation Guide
Creating a dessert that’s both tender and flavorful starts with the right techniques. We’ll walk you through each step to ensure your bake turns out perfectly every time.
Mixing Dry and Wet Ingredients
Begin by combining your dry ingredients in a large bowl. Whisk together flour, baking soda, and your favorite spices. This ensures even distribution and prevents clumps.
In a separate bowl, mix the wet ingredients. Blend oil, applesauce, eggs, and a splash of vanilla. This step helps create a smooth batter that’s easy to work with.
Gently fold the wet mixture into the dry ingredients. Avoid overmixing to keep the crumb tender and light. This technique locks in the flavor and texture.
Baking Tips to Achieve a Moist Crumb
Preheat your oven to the ideal temperature before you start. This ensures even baking from the very beginning.
Pour the batter into a prepared pan and smooth the top. Bake for the recommended time, checking with a toothpick to confirm doneness.
If the top starts to brown too quickly, lightly cover it with aluminum foil. This prevents overbrowning while keeping the inside moist. Let it cool before serving for the best results.
How to Create the Cream Cheese Frosting
The secret to elevating any dessert lies in the perfect frosting. Our cream cheese frosting is a game-changer, offering a tangy sweetness that complements the warm flavors of your bake. With a few simple steps, you can achieve a smooth and indulgent topping that’s sure to impress.
Browning the Butter for Richness
Start by browning the butter to add depth and richness. Melt it in a saucepan over medium heat, stirring constantly until it turns a rich amber color. This process takes about 5 minutes. Once browned, let it cool for a minute before chilling it in the fridge until firm.
Techniques for a Silky Texture
For the smoothest results, ensure your cream cheese and butter are at room temperature. Beat them together until creamy, then gradually add powdered sugar. Incorporate vanilla extract for a hint of flavor. If the frosting is too thin, add more sugar until it reaches the desired consistency.
| Ingredient | Measurement |
|---|---|
| Cream Cheese | 8 oz |
| Butter | 1/2 cup |
| Powdered Sugar | 2 cups |
| Vanilla Extract | 1 tsp |
This cheese frosting is not only easy to make but also versatile. Spread it generously over your dessert for a finishing touch that’s as beautiful as it is delicious. With these tips, you’ll master the art of creating a silky, irresistible topping every time.
Variations: Layer Cake, Bundt Cake, and Cupcakes
Discover how one batter can create multiple dessert masterpieces. Whether you’re hosting a party or baking for a cozy night in, this recipe adapts beautifully to different formats. From a classic two-layer creation to a stunning Bundt design or delightful cupcakes, the possibilities are endless.
Adapting the Recipe for Different Pans
When baking a layer version, divide the mixture evenly between two greased pans. This ensures both tiers bake uniformly. For a Bundt style, pour the entire batter into a well-greased pan, ensuring every crevice is coated to prevent sticking.
Cupcakes are perfect for portion control. Use a scoop to fill liners two-thirds full. This prevents overflow and guarantees even baking. Adjust the oven time accordingly—cupcakes bake faster than a full-sized dessert.
Tips for Even Baking and Preventing Doming
To achieve a flat top, use cake strips around your pans. These insulate the edges, promoting an even rise. Parchment paper at the bottom of your pan also helps with easy removal and prevents sticking.
For Bundt designs, let the dessert cool in the pan for 10 minutes before flipping. This ensures it retains its intricate shape. With cupcakes, rotate the tray halfway through baking for consistent browning.
No matter the format, the warm flavors of cinnamon and vanilla remain intact. These variations let you enjoy the same rich taste in a style that suits your occasion. Experiment and find your favorite way to serve this timeless treat!
Baking Techniques and Troubleshooting Tips
Mastering the art of baking involves understanding the little details that make a big difference. Even the most experienced bakers can face challenges, but with the right techniques, you can achieve a flawless dessert every time. Let’s dive into some expert tips to help you avoid common pitfalls and ensure your bake turns out perfectly.
Preventing Overbrowning and Doming
One of the most common issues is overbrowning. To prevent this, loosely cover your dessert with aluminum foil if the top starts to darken too quickly. This simple step allows the inside to bake evenly while protecting the exterior.
Doming, or a raised center, can be frustrating. To avoid this, use cake strips around your pan. These insulate the edges, promoting an even rise. Additionally, ensure your oven is preheated to the correct temperature before you begin.
Ensuring Even Baking Throughout
Even baking starts with proper mixing. Combine your dry ingredients thoroughly to avoid clumps, and gently fold in the wet ingredients. Overmixing can lead to a dense crumb, so mix just until everything is incorporated.
Monitor your oven’s temperature throughout the process. Ovens can fluctuate, so using an oven thermometer ensures accuracy. Rotate your pan halfway through baking to promote even browning.
Finally, use the toothpick test to check for doneness. Insert a toothpick into the center—if it comes out clean, your bake is ready. These small adjustments can make a significant difference in the final texture and flavor of your dessert.
Tips for Making-Ahead and Freezing Your Cake
Planning ahead can make your baking experience even more enjoyable. This dessert is perfect for preparing in advance, as its flavors deepen over time. Whether you’re hosting a gathering or simply want a treat ready to go, these tips will help you store it properly.
First, let the dessert cool completely before storing. This prevents condensation, which can affect the texture. Once cooled, wrap it tightly in plastic wrap or aluminum foil. For added protection, place it in an airtight container before refrigerating or freezing.
If you’re refrigerating it, keep it in the refrigerator for up to three days. The flavors will continue to develop, making it even more delicious by the second day. For longer storage, freeze it for up to three months. Wrap it in multiple layers to prevent freezer burn.
When you’re ready to serve, thaw it in the refrigerator overnight. This gradual process helps maintain the texture. If you’re in a hurry, let it sit at room temperature for about 30 minutes before serving.
Here are some additional tips to ensure success:
- Use a slightly different mix for freezing. Reduce the amount of oil by a tablespoon to prevent sogginess after thawing.
- If you’re adding frosting, wait until the dessert is fully thawed. This ensures the topping spreads smoothly.
- For a moist crumb, add an extra cup of applesauce to the recipe before freezing.
By following these steps, you’ll have a dessert that’s just as fresh and flavorful as the day it was baked. Whether you’re planning for a special occasion or simply want a treat on hand, these make-ahead tips are a game-changer.
User-Friendly Presentation and Serving Suggestions
Presentation is key when it comes to making your dessert stand out. A beautifully decorated creation not only looks inviting but also enhances the overall dining experience. Here, we’ll share expert tips to help you style and serve your dessert like a pro.
Creative Styling Ideas
Elevate your dessert with simple yet elegant garnishes. Candied nuts add a delightful crunch and a touch of sophistication. For a creamy finish, consider a dollop of whipped cream or a drizzle of caramel sauce.
If you’ve leveled off the top of your dessert, don’t discard the scraps. Crush them into fine crumbs and sprinkle them over the frosting for a textured, rustic look. This not only reduces waste but also adds visual appeal.
Serving Suggestions
Pair your dessert with complementary flavors for a memorable experience. A scoop of vanilla ice cream or a dollop of whipped cream adds a cool contrast to the warm spices. For a tangy twist, serve it with a side of cheese frosting.
Proper slicing techniques are essential to maintain the dessert’s integrity. Use a sharp knife dipped in warm water for clean cuts. This ensures each slice looks as good as it tastes.
Practical Tips for Transferring and Garnishing
Transferring your dessert to a serving platter can be tricky. Use a flat spatula or a cake lifter for stability. Place it on a decorative bowl or cake stand to make it the centerpiece of your table.
For the final touch, garnish with fresh berries, edible flowers, or a dusting of powdered sugar. These small details can transform your dessert into a show-stopping masterpiece.
| Garnishing Ideas | Pairing Suggestions |
|---|---|
| Candied Nuts | Vanilla Ice Cream |
| Whipped Cream | Caramel Drizzle |
| Crushed Cake Crumbs | Cheese Frosting |
With these tips, you’ll create a dessert that’s as visually stunning as it is delicious. Whether you’re hosting a gathering or enjoying a quiet evening, these presentation ideas will leave a lasting impression.
Mastering the spice cake recipe: Expert Tips and Tricks
Perfecting a dessert requires more than just following a recipe—it’s about mastering the little details. We’ve gathered insider secrets to help you elevate every step of the process, from mixing the batter to achieving the perfect cream cheese frosting.
Insider Secrets from Our Kitchen
One of the most transformative techniques is browning butter. This process adds a rich, nutty flavor to your frosting. Melt the butter in a saucepan over medium heat, stirring constantly until it turns amber. Let it cool for a minute before chilling it in the refrigerator until firm.
For the batter, precise mixing is key. Overmixing can lead to a dense texture, so fold the wet and dry ingredients together gently. Use room-temperature ingredients to ensure a smooth consistency. This small adjustment makes a big difference in the final result.
When assembling your layer creation, level each tier for stability. Use a serrated knife to trim the tops if needed. A crumb coat of frosting helps seal in any loose crumbs, ensuring a clean finish for the final layer.
Subtle Tweaks for Enhanced Flavor
Adjusting ingredient measurements can elevate the flavor profile. For example, adding an extra teaspoon of vanilla enhances the sweetness, while reducing the sugar slightly can balance the richness. These small changes allow you to customize the dessert to your taste.
| Ingredient | Adjustment | Effect |
|---|---|---|
| Vanilla Extract | +1 tsp | Enhanced sweetness |
| Sugar | -2 tbsp | Balanced richness |
| Butter | Brown before use | Nutty flavor |
Finally, test for doneness with a toothpick. Insert it into the center—if it comes out clean, your dessert is ready. These expert tips ensure a flawless outcome every time, whether you’re baking for a special occasion or simply indulging in a cozy treat.
Conclusion
There’s nothing quite like the comfort of a well-crafted dessert to bring people together. Our classic creation is designed to be both indulgent and convenient, perfect for any occasion. From selecting the finest ingredients to achieving the perfect cream cheese frosting, every step has been optimized for flavor and ease.
We encourage you to experiment with the variations and troubleshooting tips provided. Even minor adjustments will ensure your bake comes clean and delicious every time. Proper cooling and storage at room temperature or in the refrigerator will keep it fresh for days.
Thank you for joining us on this baking journey. We’d love to hear about your experiences and creative twists on this timeless recipe. Share your results with us and inspire others to create their own cozy moments!