The Ultimate Guide to Crafting a Minecraft Cake
Picture this: a birthday party where guests gasp as you unveil a Minecraft Cake that looks like it’s made of digital blocks. The room buzzes with excitement as kids (and adults) point at familiar shapes inspired by their favorite video game. This is the magic of combining baking with creativity—turning ordinary ingredients into edible art that sparks joy.
Creating these themed treats isn’t just about following a recipe. It’s about mastering techniques that bring the game’s iconic pixelated style to life. Whether you’re shaping fondant into 3D cubes or mixing colors to match in-game textures, every detail matters. The best part? You don’t need to be a professional baker to achieve stunning results.
This guide breaks down everything from selecting the right tools to balancing bold designs with delicious flavors. You’ll learn how to transform basic supplies into geometric masterpieces that stay true to the game’s blocky charm. Even better, the methods adapt to all skill levels—so whether you’re a first-time decorator or a seasoned pro, there’s something here for you.
Key Takeaways
- Master techniques to replicate the game’s signature pixelated style in your desserts
- Discover how everyday baking tools can create striking geometric designs
- Balance artistic vision with practical execution for showstopping results
- Adapt methods to your skill level, from simple shapes to complex builds
- Choose materials that ensure structural stability without sacrificing taste
- Learn professional tricks for transporting and displaying your creation
Why Choose a Minecraft Cake for Your Celebration?
Envision a centerpiece that captures the essence of a beloved digital world while satisfying real-world sweet cravings. These edible masterpieces do more than just feed guests—they ignite imaginations and spark conversations.
Themed Fun and Visual Appeal
The signature blocky aesthetic translates perfectly into dessert form. Bright squares of frosting mimic in-game textures, while fondant tools and creatures add playful depth. This approach turns ordinary treats into edible art that delights both casual players and dedicated fans.
Color plays a crucial role. Vibrant greens mimic grassy biomes, while rich browns recreate wooden structures. These bold hues make desserts pop against party decorations, creating instant visual harmony.
Customization for Every Party
Tailor your creation to reflect personal favorites. Choose from:
- Biome-inspired color schemes (lush forests or snowy peaks)
- Edible character toppers representing iconic figures
- Hidden details like edible redstone dust or glow-in-the-dark elements
One baker notes: “Parents love seeing their child’s username incorporated—it adds that magical personal touch.” This adaptability ensures your dessert becomes a true reflection of the guest of honor.
Social media-ready designs encourage sharing, extending the celebration beyond the party itself. Whether creating a simple square base or multi-tiered masterpiece, the design scales to match your vision and skill level.
Step-by-Step Guide to Making Your Minecraft Cake
Transform your kitchen into a bakery workshop with this precise blueprint for building edible blocks. Success lies in meticulous preparation and understanding how ingredients interact during each phase.
Gathering Ingredients and Prepping Your Workspace
Start by lining up these essentials:
- 2⅓ cups flour + ½ cup cocoa powder
- 1 cup softened butter + 1⅓ cups white sugar
- 4 room-temperature eggs
- 1 cup milk + 2 tsp vanilla
Grease two 9-inch square pans using butter and dust with flour. Professional bakers recommend: “Always tap pans after flouring to eliminate clumps that create texture imperfections.”
| Stage | Temperature | Duration |
|---|---|---|
| Preheat | 350°F | 15 mins |
| Baking | 350°F | 30-40 mins |
| Cooling | Room temp | 40 mins |
Mixing, Baking, and Assembling Your Cake Layers
Beat butter and sugar for 4 minutes until pale. Add eggs one at a time, mixing thoroughly after each. Alternate dry ingredients with milk in three additions, scraping the bowl between mixes.
Divide batter evenly between pans. Bake until toothpick tests clean. Cool 10 minutes in pans, then transfer to racks. Once fully cooled, trim domed tops with a serrated knife.
Spread cherry jam between layers, then apply chocolate buttercream. Reserve ½ cup frosting for decorations. Chill assembled dessert 20 minutes before adding final touches.
Crafting Eye-Catching Minecraft Decorations
Elevate your dessert’s visual impact through strategic material selection and color mastery. Edible decorations become building blocks for your creative vision when handled with precision.
Utilizing Fondant, Marzipan, and Food Coloring
Start with 14 ounces of marzipan or white fondant. Knead 5 drops of red food coloring into the base for consistent hue distribution. Pro tip: Wear food-safe gloves to prevent stained hands while mixing vibrant shades.
Roll the colored material to ¼-inch thickness using guide rings on your rolling pin. This ensures uniform squares that stack neatly. Cut shapes with sharp cookie cutters or pizza wheels for crisp edges.
| Material | Best For | Drying Time |
|---|---|---|
| Marzipan | 3D elements | 24 hours |
| Fondant | Flat surfaces | 12 hours |
Use reserved buttercream as edible glue. Apply thin layers with a brush to attach pieces without visible residue. One baker advises: “Test color samples on scrap pieces first—some shades darken as they dry.”
Store finished decorations in airtight containers at room temperature. Avoid refrigeration, which causes condensation and color bleeding. For multi-day projects, wrap pieces in parchment paper to prevent sticking.
Creative Minecraft Cake Designs to Inspire You
Unlock endless possibilities by transforming your Minecraft Cake into edible landscapes and character-driven scenes. The blocky aesthetic offers unique opportunities to blend geometric precision with playful storytelling through sugar art.
Blocky Landscapes and Pixelated Patterns
Recreate iconic biomes using layered fondant squares in varying shades. For forest scenes, alternate four green hues to mimic grassy textures. Underground designs thrive with slate-gray buttercream and edible metallic dust for ore effects.
| Design Element | Material | Color Palette |
|---|---|---|
| Grass Blocks | Fondant squares | Moss, lime, forest, olive |
| Stone Layers | Airbrushed ganache | Charcoal, slate, pearl |
| Water Features | Edible gel sheets | Cobalt, aqua, translucent |
Stack tiers at staggered angles to simulate 3D terrain. One baker shares: “Use toothpicks to secure ‘floating’ elements—they’re invisible but prevent collapses.” Add depth with edible moss sprinkles between blocks.
Iconic Characters and Toppers
Bring game personalities to life through two approaches:
- Handcrafted figures: Mold marzipan into Creepers with 8-bit faces
- Pre-made accents: Use licensed toppers for instant recognition
Balance scale by making characters 1.5 times larger than environmental elements. This ensures they dominate the scene without overwhelming the design. For tiered creations, place figures on the top layer to guide viewers’ eyes upward.
Store-bought options work well for time-crunched projects. Look for food-safe acrylic toppers with matte finishes that mimic the game’s textures. Pair them with handmade blocks for a personalized touch.
Tips and Tricks for Easy Decoration Techniques
Transform basic desserts into edible masterpieces using clever shortcuts that prioritize efficiency without sacrificing style. These methods let you focus on creative execution rather than complex baking processes.
DIY Hacks with Store-Bought Cakes
Start with pre-made square vanilla bases for instant structural perfection. Square-shaped candies like caramel wafers or chocolate blocks create pixel patterns in minutes. Arrange them using game-inspired textures as reference—no fondant expertise required.
| Tool | Best Use | Time Saved |
|---|---|---|
| Cookie cutters | Uniform squares | 15 mins |
| Edible markers | Texture details | 20 mins |
| Pre-printed icing sheets | Complex designs | 45 mins |
Decorating with Icing and Edible Printables
Apply a smooth buttercream layer as your canvas. “Thin coatings work best—they let printed textures lie flat without wrinkles,” advises a professional decorator. Use edible sugar sheets with pre-designed patterns for instant visual impact.
Label each decoration zone with toothpick guidelines to maintain alignment. Combine store-bought elements with handmade touches for balanced results. This approach delivers detailed data on design execution while keeping the process cake-easy for beginners.
Exploring Variations on the Classic Minecraft Cake

Break free from standard designs by reimagining classic elements through creative twists. These adaptations let you showcase multiple facets of the game’s universe while maintaining structural simplicity. Each variation balances authenticity with practical execution, ensuring your centerpiece becomes the celebration’s highlight.
Incorporating Themes Like Creepers, TNT, and Steve
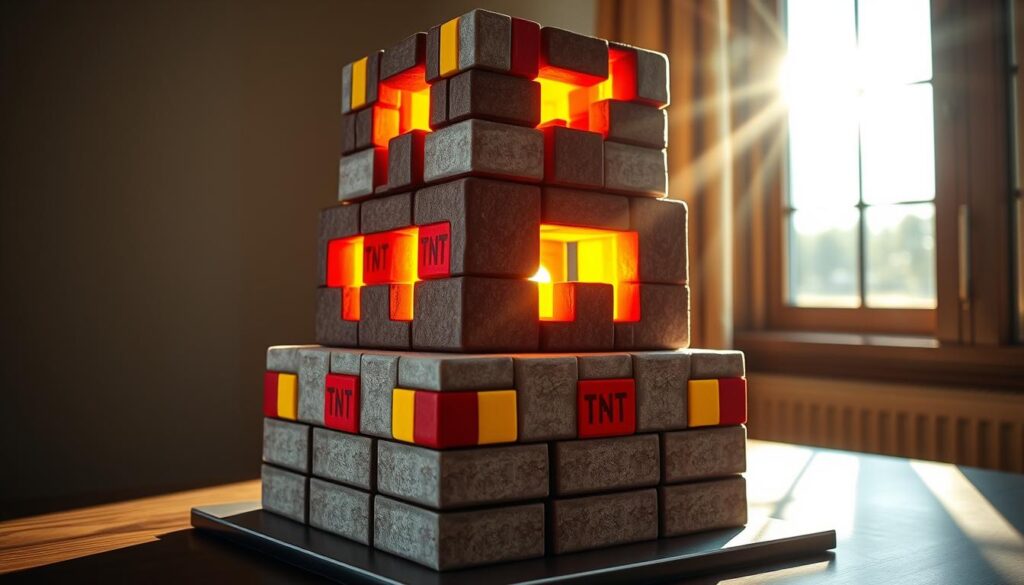
Transform chocolate bases into explosive TNT blocks with lush green icing mimicking grassy terrain. Secure red household candles bound with printed “TNT” labels for instant recognition. Pro tip: Use edible markers to add weathering effects on candle wrappers for aged dynamite visuals.
| Theme | Key Materials | Signature Feature |
|---|---|---|
| TNT Block | Green buttercream, red candles | Printed fuse labels |
| Creeper Face | Moss-colored fondant | Black square grid pattern |
| Steve Figure | Azure & chestnut fondant | Pixelated accessory details |
For Creeper designs, mix gel colors gradually to achieve the signature acidic green hue. One baker suggests: “Test shades under natural light—artificial bulbs can distort color perception.” Apply facial patterns using stencils cut from parchment paper for razor-sharp edges.
Pull-apart cupcake arrangements solve serving challenges at large gatherings. Frost each square-shaped treat individually, then assemble into larger blocks. This approach lets guests grab portions without disrupting the overall design.
Combine themes by creating tiered landscapes. Place Steve figurines beside TNT clusters on chocolate rock formations. Use staggered levels to suggest depth, securing elements with toothpick anchors hidden beneath frosting.
Mastering the Art of Minecraft Cake
Achieving bakery-quality results requires merging technical skill with creative problem-solving. Focus on three core elements: structural precision, flavor harmony, and visual storytelling. Each decision impacts both aesthetics and functionality, from ingredient swaps to presentation choices.
Expert Techniques for a Perfect Finish
Use an offset spatula dipped in warm water to smooth buttercream into flawless surfaces. Chill layers 20 minutes before stacking—this prevents shifting and maintains sharp edges. For jam alternatives, sandwich tiers with vanilla buttercream to reduce sweetness while adding richness.
Balancing Texture, Flavor, and Design
Pair dense chocolate bases with airy fillings like whipped ganache for contrast. At 837 calories per serving, consider smaller portions or diet-friendly substitutions without compromising taste. Position store-bought figures like Lego Creepers at the center for instant recognition, ensuring all sides showcase handcrafted details.
Evaluate your creation’s structural value by testing weight distribution before adding delicate elements. These methods transform basic ingredients into edible engineering marvels that honor the game’s spirit while delivering real-world delight.


